
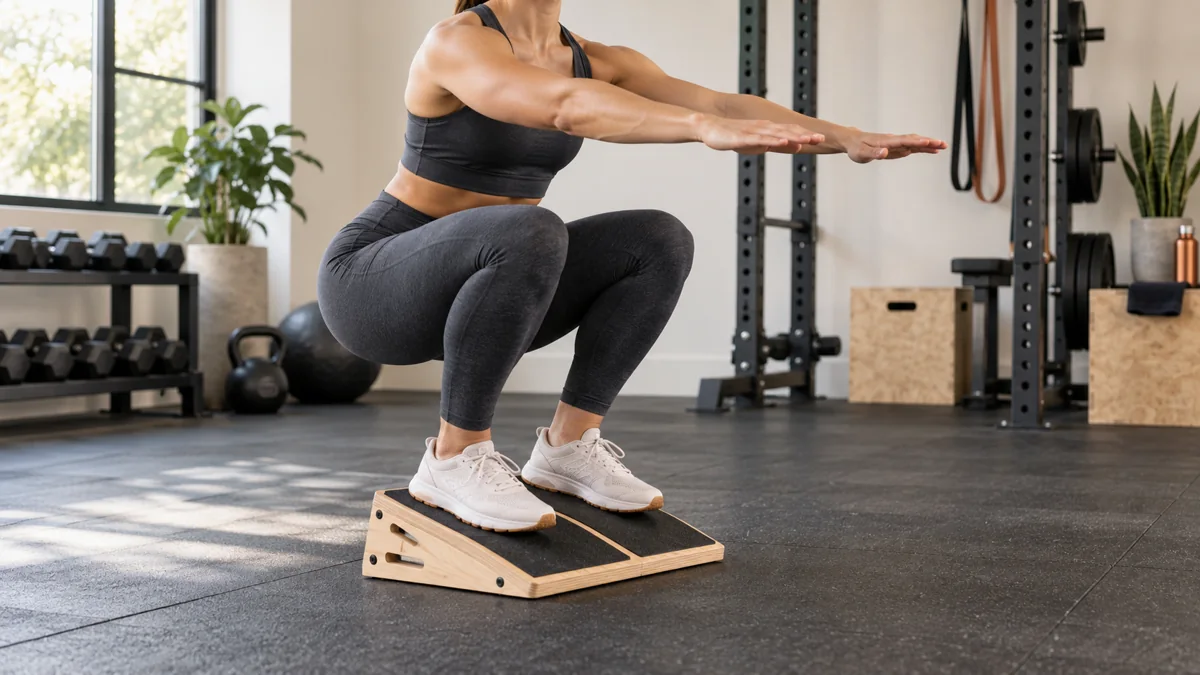
Turn One Inclined Platform Into a Full Lower-Body Training Tool
These 15 slant board exercises cover calf flexibility, ankle mobility, heel-elevated squats, lower-leg strength, and balance—with clear setup cues and sensible progressions.
A slant board changes the angle between your feet and the floor. Depending on which direction you face and how you position your body, that simple change can make a calf stretch more consistent, reduce the ankle range needed in a squat, increase the range available during a calf raise, or create a controlled balance challenge.
You do not need to perform every movement in one workout. Start with the exercises that fit your goal, use a low incline, and earn more range or resistance through controlled repetitions rather than forcing the position.
Before You Start
Check the board before every session. The adjustment support should be fully seated, the surface should not rock, and both the top tread and floor-contact points should be clean. For loaded exercises, confirm that the product is intended for the total weight of the user plus the external load.
Slant Board Mobility Exercises
Use these drills as a warmup, a standalone mobility block, or controlled work after training. Stretch to tolerable tension—not pain—and avoid bouncing.
Straight-Knee Calf Stretch
Primary focus: gastrocnemius and ankle dorsiflexionSetup
Face uphill with one foot fully supported on the board. Hold a wall or rail and keep the working knee straight but relaxed.
How to do it
- Stand tall with the heel heavy on the board.
- Shift your hips forward until the upper calf feels a comfortable stretch.
- Hold for 20–30 seconds while breathing normally.
- Step off and repeat on the other side.
Bent-Knee Soleus Stretch
Primary focus: soleus and deeper ankle rangeSetup
Use the same uphill-facing position, but soften the working knee while keeping the heel planted.
How to do it
- Hold support and center your weight over the working foot.
- Bend the knee forward in line with the middle toes.
- Keep the heel down and torso controlled.
- Hold 20–30 seconds per side.
Supported Ankle Rocks
Primary focus: dynamic dorsiflexion controlSetup
Stand with one foot uphill on a low incline and both hands lightly supported.
How to do it
- Slowly guide the knee forward over the toes.
- Pause before the heel lifts or the arch collapses.
- Return to the start without locking the knee.
- Perform 8–12 smooth repetitions per side.
Split-Stance Ankle Mobilization
Primary focus: ankle range in a functional stanceSetup
Place the front foot uphill on the board and the rear foot comfortably behind you. Hold a stable support.
How to do it
- Keep most of your weight over the front foot.
- Guide the front knee forward while the heel stays down.
- Keep the pelvis facing forward.
- Complete 8–10 controlled repetitions per side.
Supported Heel-Elevated Squat Hold
Primary focus: squat-position mobilitySetup
Face downhill so both heels are elevated. Hold a rack, doorframe, or secure rail with both hands.
How to do it
- Set your feet at a comfortable squat width.
- Sit down between the hips while allowing the knees to travel forward.
- Stop at a depth you can control without pain.
- Hold for 10–20 seconds, then stand with assistance.
Heel-Elevated Squat and Leg Exercises
Heel elevation reduces the ankle dorsiflexion required for a given squat position and can change lower-body mechanics. Treat it as a useful variation—not a universal replacement for flat-ground squatting.
Heel-Elevated Bodyweight Squat
Primary focus: squat control and quadricepsHow to do it
- Face downhill with both heels supported.
- Brace gently and sit down between the hips.
- Let the knees track in the same direction as the toes.
- Stand by driving through the whole foot.
Perform 2–3 sets of 8–15 controlled repetitions.
Heel-Elevated Goblet Squat
Primary focus: quadriceps and upright squat strengthHow to do it
- Hold a dumbbell or kettlebell close to the chest.
- Set both heels securely on the board.
- Descend slowly while keeping the load close.
- Pause briefly, then stand without bouncing.
Use 2–4 sets of 6–12 repetitions with a load you can control.
Cyclist Squat
Primary focus: narrow-stance quadriceps workSetup
Face downhill with the heels elevated and feet closer than your usual squat stance. Use support until the position feels familiar.
How to do it
- Keep the torso tall and knees tracking forward.
- Lower under control without forcing depth.
- Stand smoothly and finish tall.
- Complete 8–15 repetitions.
Heel-Elevated Wall Squat
Primary focus: supported quadriceps enduranceSetup
Place the board far enough from a wall that your back can make comfortable contact while both heels stay centered.
How to do it
- Slide down the wall to a manageable depth.
- Keep the knees aligned with the toes.
- Hold 15–30 seconds or perform short controlled repetitions.
- Press through the feet to stand.
Front-Heel-Elevated Split Squat
Primary focus: unilateral leg strengthSetup
Place the front heel on the lower portion of the incline with the entire front foot supported. Step the other foot behind and hold a rail.
How to do it
- Lower both knees while keeping most pressure through the front foot.
- Let the front knee travel naturally over the toes.
- Stop before the front heel or board loses contact.
- Stand and repeat 6–10 times per side.
Calf and Lower-Leg Strength Exercises
Facing uphill places the toes above the heel and can increase the bottom range available in calf-raise variations. Keep the board secured and use support so balance does not limit the calf work.
Incline Standing Calf Raise
Primary focus: gastrocnemius and plantarflexion strengthHow to do it
- Face uphill with both feet supported and knees nearly straight.
- Hold a wall or rail.
- Rise onto the balls of the feet without rolling the ankles outward.
- Pause, then lower slowly to the starting angle.
Perform 2–4 sets of 8–15 repetitions.
Eccentric Calf Lower
Primary focus: slow lowering strengthHow to do it
- Face uphill and rise using both legs.
- Shift more weight to one leg while holding support.
- Lower that heel slowly for 3–5 seconds.
- Use both legs to return to the top.
Begin with 2 sets of 5–8 lowers per side.
Bent-Knee Calf Raise
Primary focus: soleus strengthHow to do it
- Face uphill with both feet centered.
- Bend the knees slightly and maintain that angle.
- Lift both heels while keeping the torso quiet.
- Pause and lower under control.
Perform 2–3 sets of 10–20 repetitions.
Balance and Control Exercises
An incline changes foot pressure and ankle demands. Use the lowest angle, stay close to support, and prioritize a quiet foot over a long hold.
Supported Single-Leg Balance
Primary focus: foot, ankle, and postural controlHow to do it
- Stand uphill on one foot with fingertips on a stable support.
- Lift the opposite foot only an inch or two.
- Maintain a soft knee and even tripod pressure through the foot.
- Hold 10–20 seconds, then switch sides.
Supported Single-Leg Mini Squat
Primary focus: ankle, knee, and hip alignmentHow to do it
- Stand on one foot on a low incline and hold support.
- Bend the knee a few inches while sending the hips slightly back.
- Keep the knee aligned with the middle toes.
- Stand smoothly and repeat 5–8 times per side.
Three Simple Slant Board Routines
Choose one routine based on the day’s goal. Rest as needed and leave several good repetitions in reserve.
| Goal | Exercises | Starting dose |
|---|---|---|
| 5-minute mobility | Straight-knee stretch, bent-knee stretch, ankle rocks | 20–30-second holds; 8 rocks per side |
| Lower-body strength | Goblet squat, split squat, standing calf raise | 2–3 sets of 8–12 controlled repetitions |
| Balance and ankle control | Ankle rocks, single-leg balance, single-leg mini squat | 2 rounds per side with external support |
Frequently Asked Questions
Which direction should I face on a slant board?
Face uphill—with the toes higher than the heels—for calf stretching, ankle rocks, and most calf raises. Face downhill—with the heels higher than the toes—for heel-elevated squat variations. Always verify that the full foot is supported.
What angle should beginners use?
Start with the lowest stable setting. The right angle is the one that creates the intended position while you can maintain foot contact, alignment, balance, and normal breathing.
Can I do slant board exercises every day?
Gentle mobility drills may be appropriate frequently for some people, but demanding strength work still needs recovery. Adjust frequency based on exercise intensity, soreness, symptoms, and the rest of your training.
Do slant board exercises improve ankle mobility?
Calf stretching can produce small improvements in ankle dorsiflexion, and controlled ankle exercises may support flexibility and balance. Results vary, and a board cannot address every cause of restricted movement.
Are heel-elevated squats bad for the knees?
Not automatically. Heel elevation changes squat mechanics and typically allows more forward knee travel. Whether that is appropriate depends on the individual, load, range, symptoms, and training goal. Use a pain-free range and progress conservatively.
Can a slant board treat plantar fasciitis or Achilles pain?
A slant board is not a diagnosis or guaranteed treatment. Some conditions may benefit from clinician-selected mobility or loading work, while aggressive stretching can worsen others. Persistent or significant pain deserves professional evaluation.
Choose the Exercise Before the Angle
The best slant board exercise is the one that matches your goal and remains controlled. Use uphill positions for calf and ankle work, downhill positions for heel-elevated squats, and external support whenever balance could distract from the movement.
Explore the Slant Boards Hub, compare the best adjustable slant boards, or see our guides to calf-stretching boards and squat wedges.
Leave a Reply